Step-by-Step: Creating a Dutch Auction
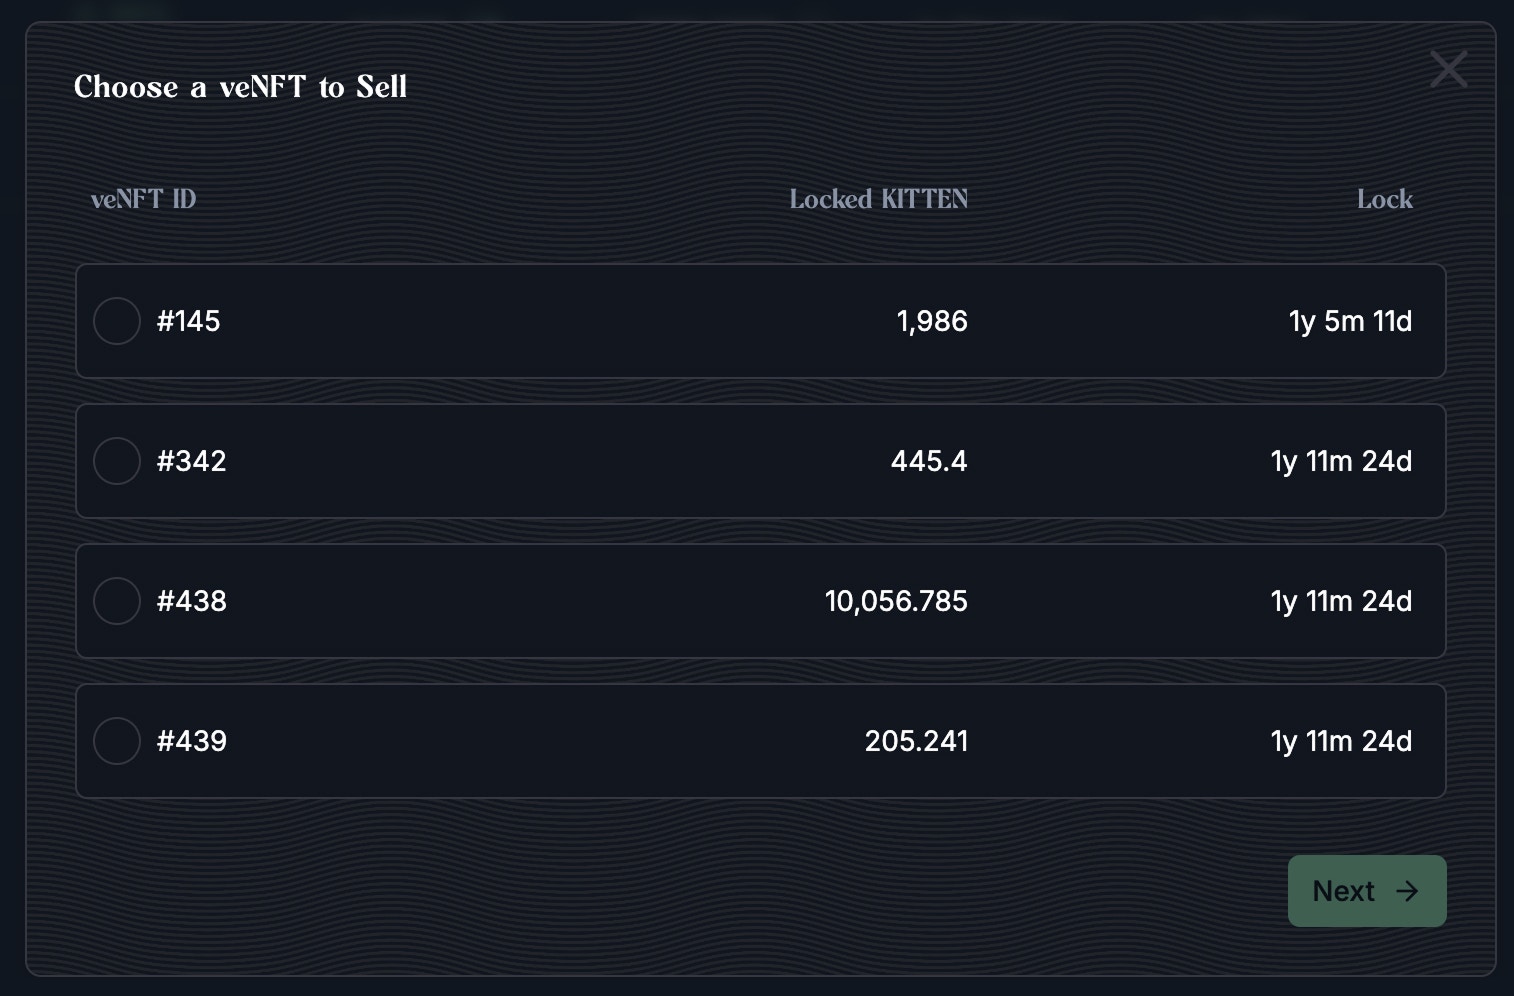
1. Select your veNFT
- Choose the veKitten NFT you want to list.
- The UI will auto-fill the lock details.
2. Set Auction Parameters
- Listing Duration – Total time your auction will be live (max 60 days).
- Start Price – The initial price the auction begins at.
- End Price – The lowest price it will reach through the discount period.
-
Discount End Date – The date at which the discounting stops.
(e.g., you can run a 60-day auction but have the discounting end on day 30 — price stays flat after that.)Example:
- Start Price: 10,000 KITTEN
- End Price: 5,000 KITTEN
- Discount Duration: 30 days
→ If the auction runs longer (e.g., 60 days), the price stays fixed at 5,000 after day 30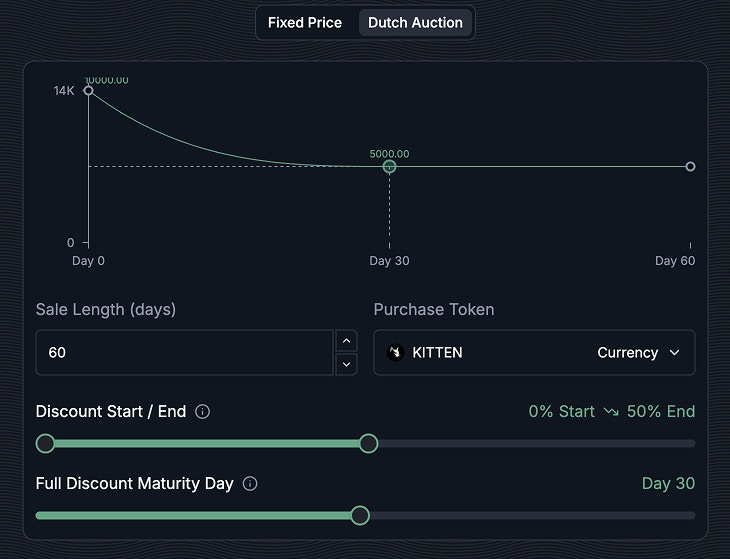
3. Review Listing Details
- The platform shows a breakdown of your expected proceeds.
- Because pricing decays over time, you’ll see the maximum and minimum proceeds depending on when the sale happens.
Example:
Start Price: 6.688 wHYPE (171.29) → If sold early, you receive up to 6.688 wHYPE→ If sold at the end, you receive 4.928 wHYPE Marketplace Fee (1.5%) is subtracted from the final sale price.
Final Proceeds:
- Max: 6.587 wHYPE ($228.98)
- Min: 4.854 wHYPE ($168.72)
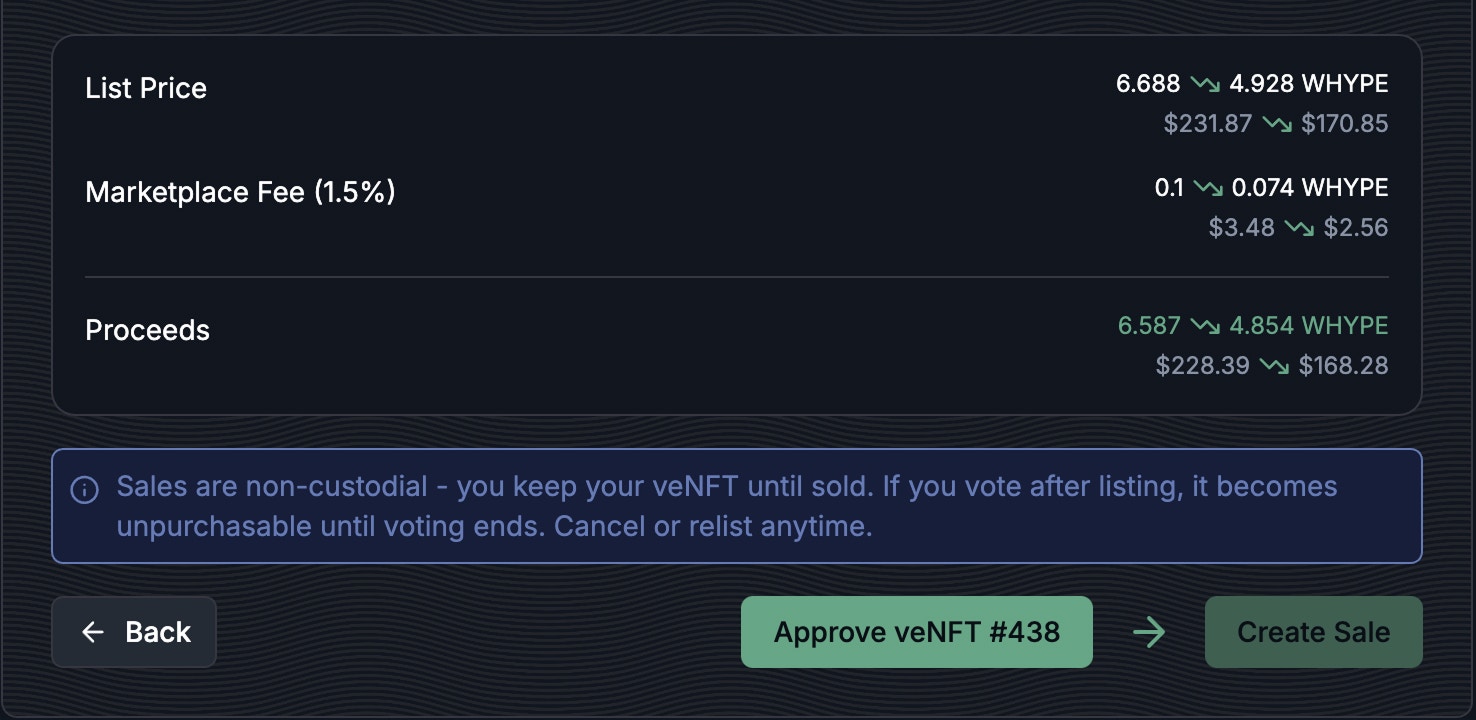
4. Approve NFT
- Click “Approve veNFT” to give the marketplace permission to manage your NFT.
- This is a one-time approval per NFT contract.
5. Create Sale
- Once approved, click “Create Sale”.
- Confirm the transaction in your connected wallet.
What Buyers See
- A dynamic price that decreases over time from your start price to end price.
- Buyers can choose to buy at any time—the longer they wait, the cheaper it gets, but at the risk of someone else buying first.